
Mac & Cheese Please!
Hi friends! It’s been a few years since I updated my Mac & Cheese recipe and since I’ve had it on repeat lately I thought you might like to see some photos and also what I’ve done to update my recipe! It doesn’t get more Southern Appalachian than this-using what you have, adding more ingredients (and love) to make something into a full meal.
The original story behind the post here was from way back in 2020 during the pandemic when I lived in Upstate NY: When Jenna first asked me to join her and the Cooperage Project for this fun and exciting new program, I knew I wanted to make Mac & Cheese. The Cooperage Project has spent countless hours over the past few months putting food boxes together for the community. And they've gotten some good, yummy donations in those boxes that includes many staples, such as pasta, cheese, milk, flour, and eggs. And Mac & Cheese came to mind first thing when we were discussing our food demo options. It's such an easy thing to make from scratch and there are so many different ways to make it! So. I shared my way of making it and then gave several different ways to modify: what if you don't have milk? What if you don't want to make a roux or temper an egg? What is a roux or tempering an egg anyway? I answered all those questions and more. So. Sit back and enjoy the show and then grab the recipe and modifications below.
Now I make this recipe about once per month. The recipe has pretty much stayed the same but I add in other ingredients depending on what I have on hand. In this week’s batch I put in some frozen spinach and frozen butternut squash, but you could add broccoli or kale or even canned pumpkin. If you go the canned pumpkin route, I would add a touch of nutmeg to it. YUM! I add in these extra ingredients before I add the pasta, just after all the cheese has melted. I like this especially if I am using anything frozen. It gives it time to heat through and then I add the pasta, give it a good stir, and then follow the steps for baking it. You can use any type of pasta that you want!
Let’s talk cheeses. I keep block cheese, such as Cabot’s, in my freezer. They are typically 8 ounce blocks and so I grab 2 out of the freezer and try to remember to thaw them before making the recipe. Other times, like this most recent batch, I grab any odds and ends of cheese that I have in the fridge. It’s a really good way to use up what you have on hand. I’ve even used goat cheese before (hello goat cheese, pumpkin, spinach or kale, and some nutmeg. Hello fall! Hello cozy weather). You can’t go wrong no matter what you use, in my opinion.
Sometimes I reheat the Mac and cheese and other times I just eat it at room temperature. It’s good for dinner one night and then lunches throughout the week. That’s what I typically do. Anyway, let me know if you’ve made this before and what version you used. Plain ol’ Mac and Cheese is good no matter what you add, or don’t add, to it!
Mac & Cheese
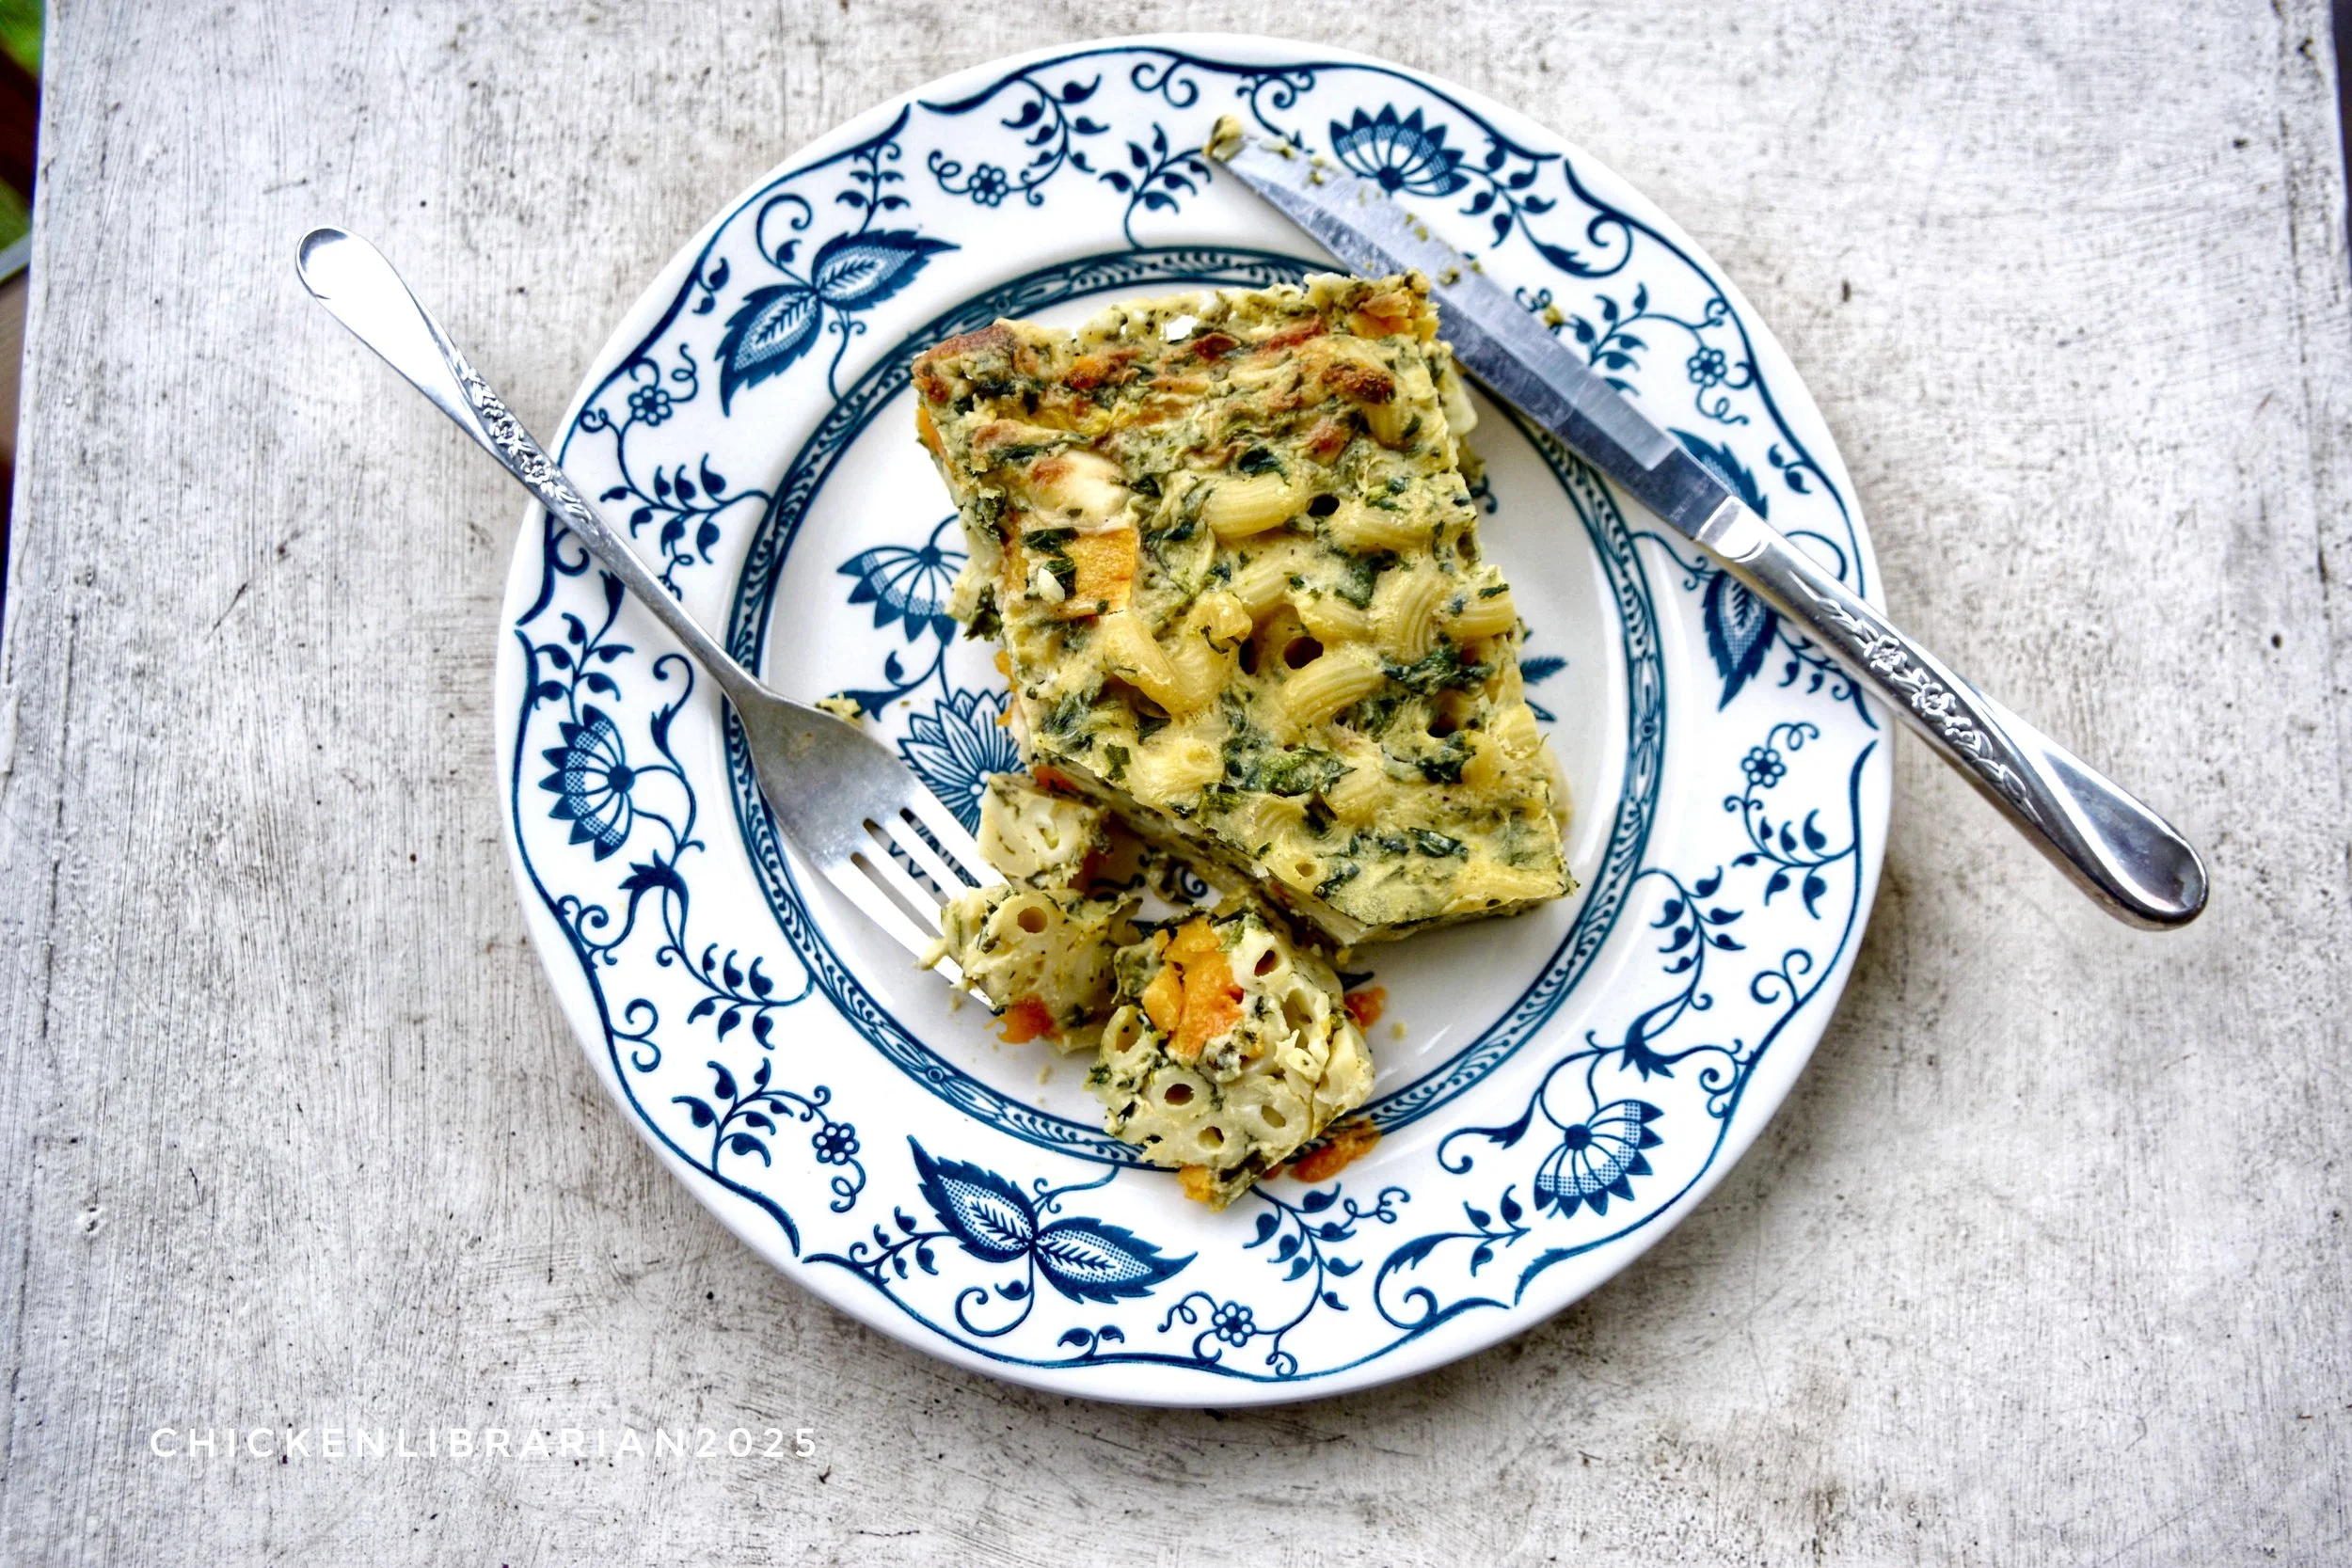
Homemade Mac & Cheese (or in this case Cavatappi & Cheese)
4 different cheeses, cavatappi pasta, butternut squash, and spinach
recipe from thepioneerwoman.com
Ingredients:
1 box dried pasta
1 whole egg, beaten
4 tablespoons butter
4 tablespoons all-purpose flour
2 1/2 cups milk
2 teaspoons dry mustard, more if desired
1 pound cheese, grated
1/2 teaspoon salt, more to taste
1/2 teaspoon ground black pepper
Instructions:
Preheat oven to 350°F.
1. Cook the pasta until very firm. It should be too firm to eat right out of the pot. Drain.
2. In a small bowl, beat the egg.
3. Make a roux: in a large pot, melt the butter and sprinkle in the flour. Whisk together over medium heat. Cook the mixture for five minutes, whisking constantly. Don’t let it burn.
4. Pour in the milk, add the mustard, salt, and pepper, and whisk until smooth. Cook for five minutes until very thick. Reduce heat to low.
5. Temper your egg: take 1/4 cup of the sauce and slowly pour it into the beaten egg, whisking constantly to avoid cooking the egg. Whisk together till smooth.
6. Pour the egg mixture into the sauce, whisking constantly. Stir until smooth. Add in the cheese and stir to melt. Taste the sauce and add more salt and pepper as needed!
7. Pour in the drained, cooked pasta and stir to combine. Serve immediately (very creamy) or pour into a baking dish, top with extra cheese (if desired), and bake for 20 to 25 minutes or until bubbly and golden on top.
Tips & Tricks:
1. If you do not want to make a roux and temper an egg skip steps 2 & 3, proceed to step 4 using the following ingredients: 4 tablespoons butter, 1 cup milk, salt, pepper, and ground mustard instead. Cook over medium heat until butter is combined, add cheese, melt cheese and milk mixture together, and then proceed to step 7.
2. This recipe cooks up very quickly so you will want to get all your ingredients in place before you start (called mise en place)! Get everything ready in small bowls (milk, egg, flour) and grate your cheese before you start. You should also have the pasta cooked beforehand. You can cook the pasta while you gather the other ingredients and measure them out.
3. A roux is equal parts flour and fat (normally butter). The traditional ratio is 4 tablespoons butter and 4 tablespoons flour, but you can use any combo as long as it's equal parts.
4. You will have some pasta left over (the recipe doesn't use a whole box) so you can use that leftover pasta to make buttered noodles. Just put the cooked pasta into a small saucepan, add butter and parmesan cheese, and any spices you'd like. Stir together until butter melts, then pour in a bowl and serve! Or if you have chickens, they love cooked pasta!
5. If you are serving the mac & cheese without baking it, just cook your pasta beforehand until it's al dente following the cooking instructions on the box of pasta. If you plan on baking it, cook the pasta until firm, but not al dente.
6. You can freeze the mac and cheese. Just follow the steps above but don't bake it. I use reusable aluminum pans for freezing things such as mac & cheese. Once you've cooked the pasta and the cheese sauce, combine the two together, pour into freezer container, let cool, cover with aluminum foil, label, and put into freezer. Sometimes I will put cooking instructions on my labels, i.e. cook at 350°F for 20-25 minutes. Your choice on whether you want to thaw first or pop in the oven frozen. If you aren't thawing first, your cook time will be longer.
7. Looking for information on milk substitutes: see this article and this article. Both are very good about explaining how to substitute dairy and non-dairy for milk.
That's it friends! Happy making!
'til next time
-k
xoxo


